A Cara Collective

  • Shop
    • Banners & Backdrops
  • Work
  • About
    • Meet Cara
    • Contact
    • Inquire
Moving Announcements with Basic Invite

Moving Announcement with Basic Invite - Truly Custom Invitations

August 26, 2020 by Cara Lentz in DIY, Festive, Home & Decor

I’ve partnered with Basic Invite to share more about their products. While this is a sponsored post, all thoughts + opinions are my honest own!

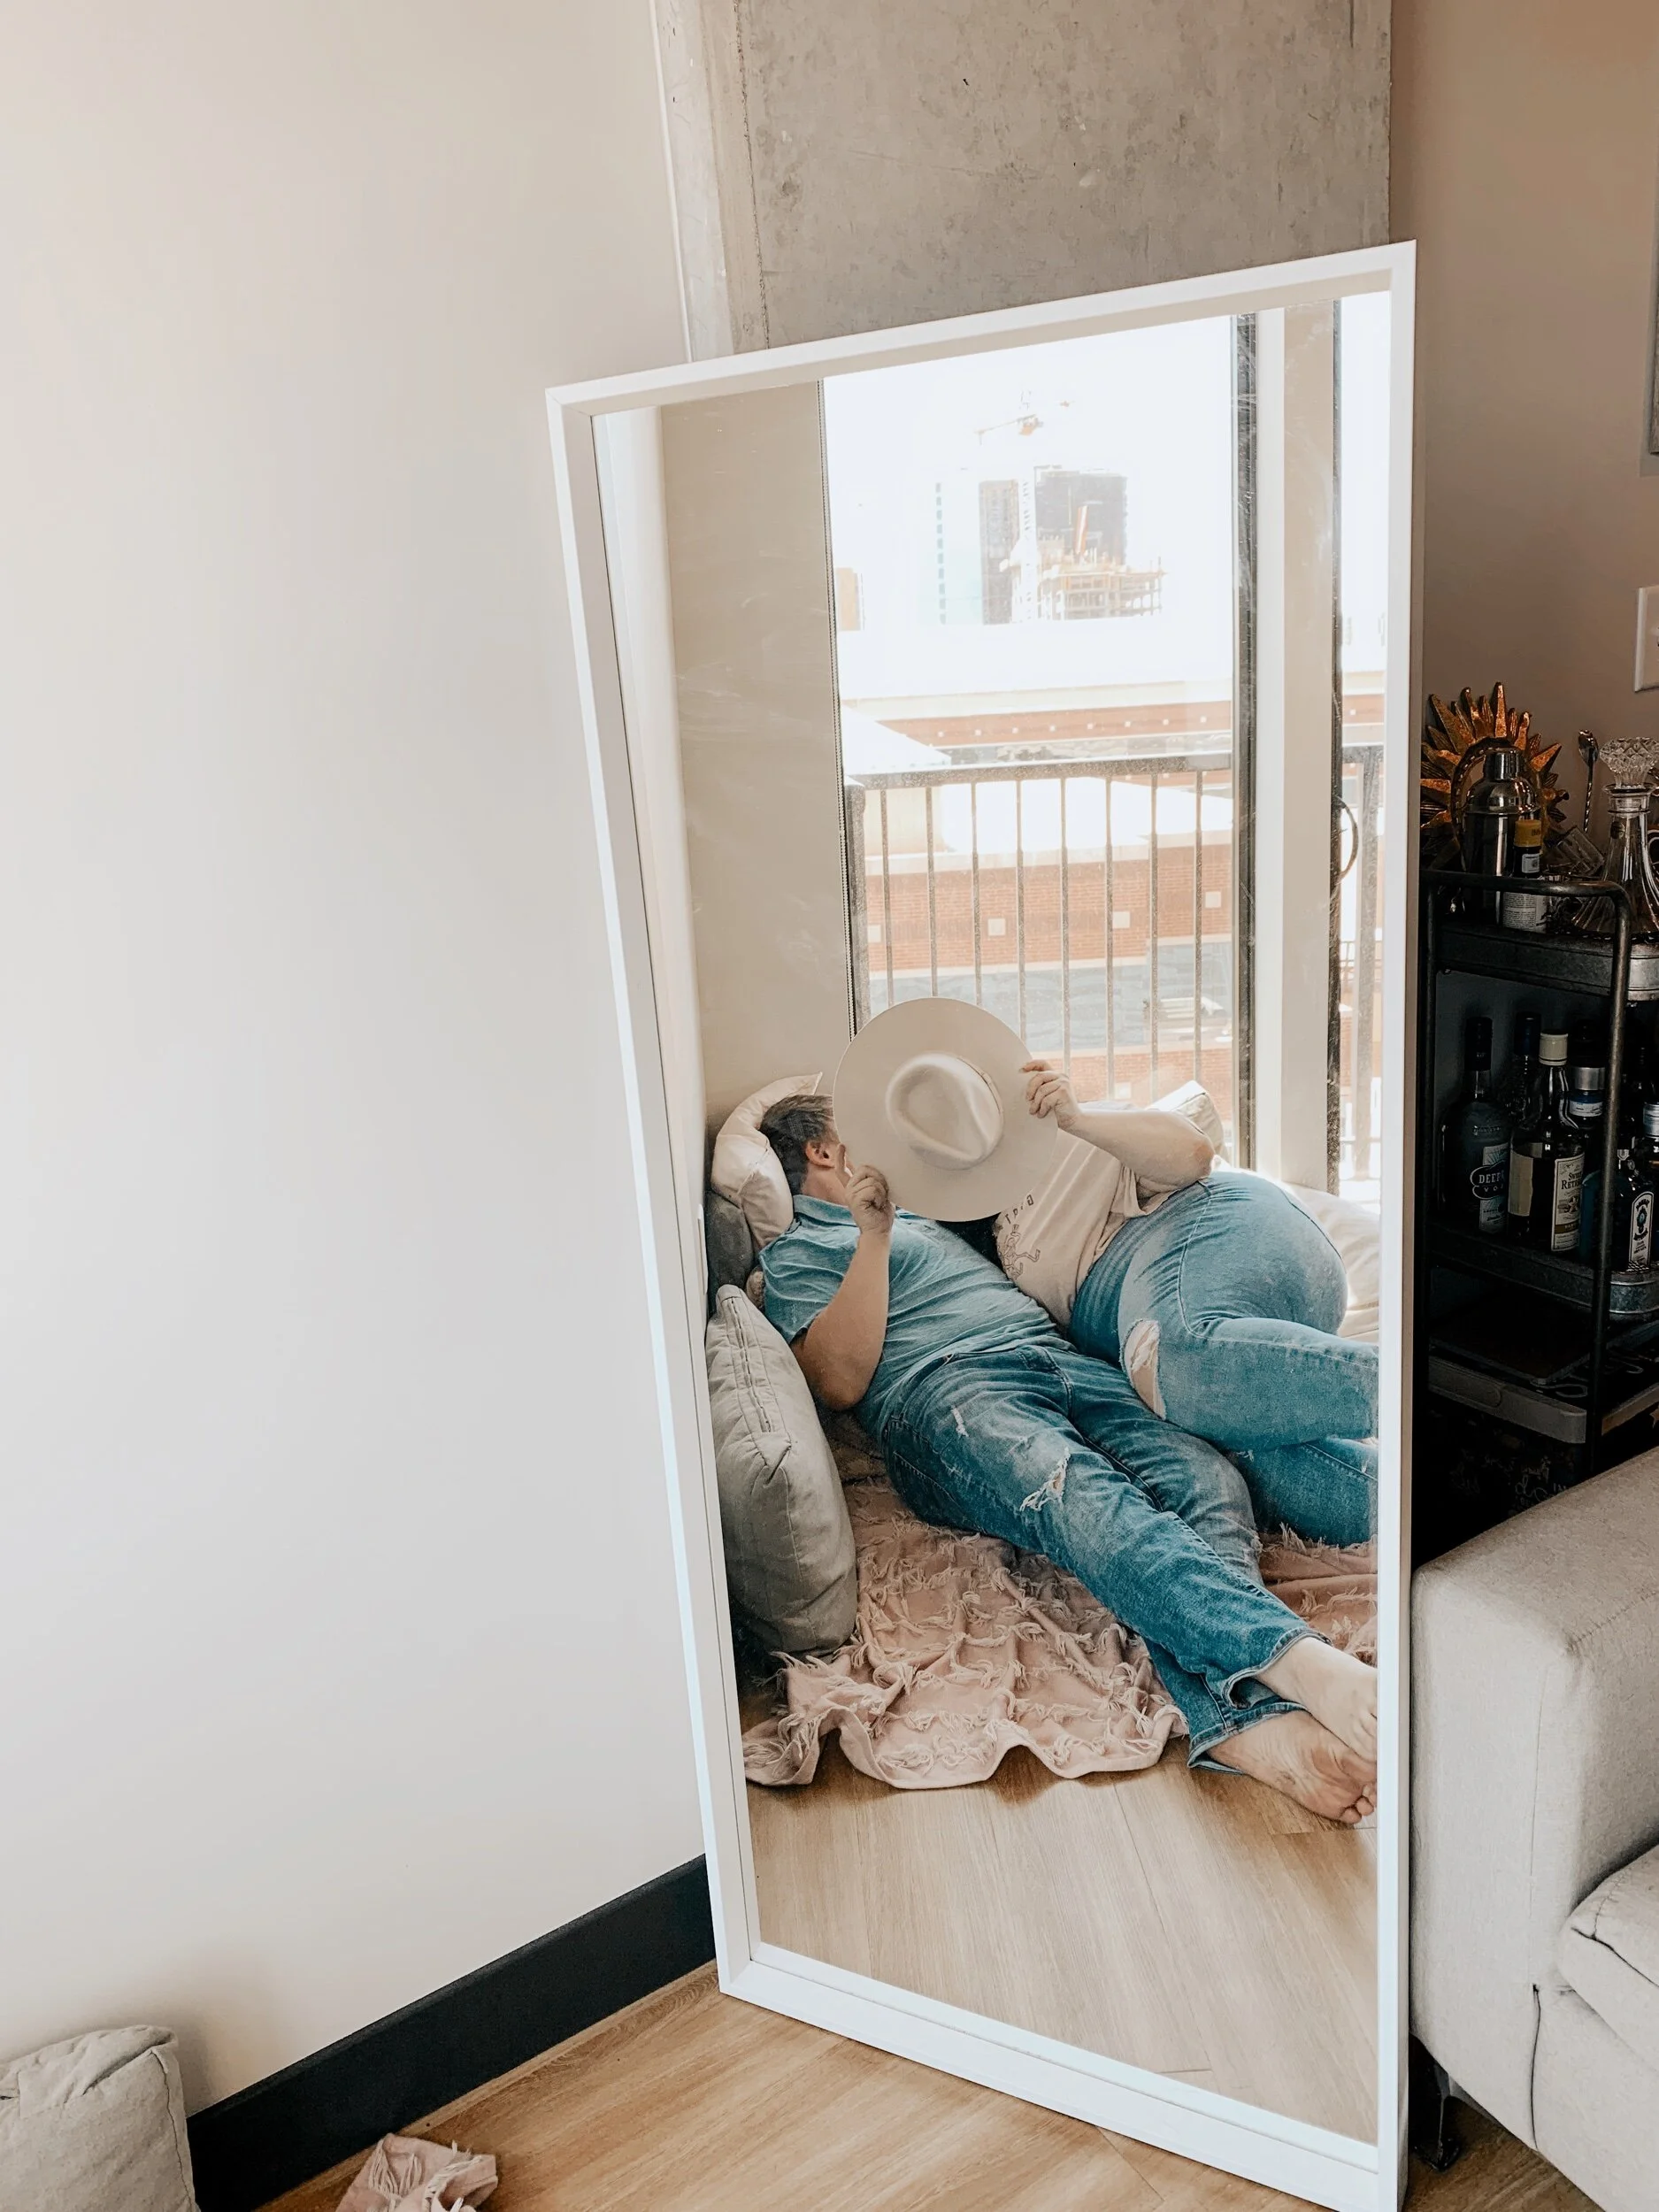
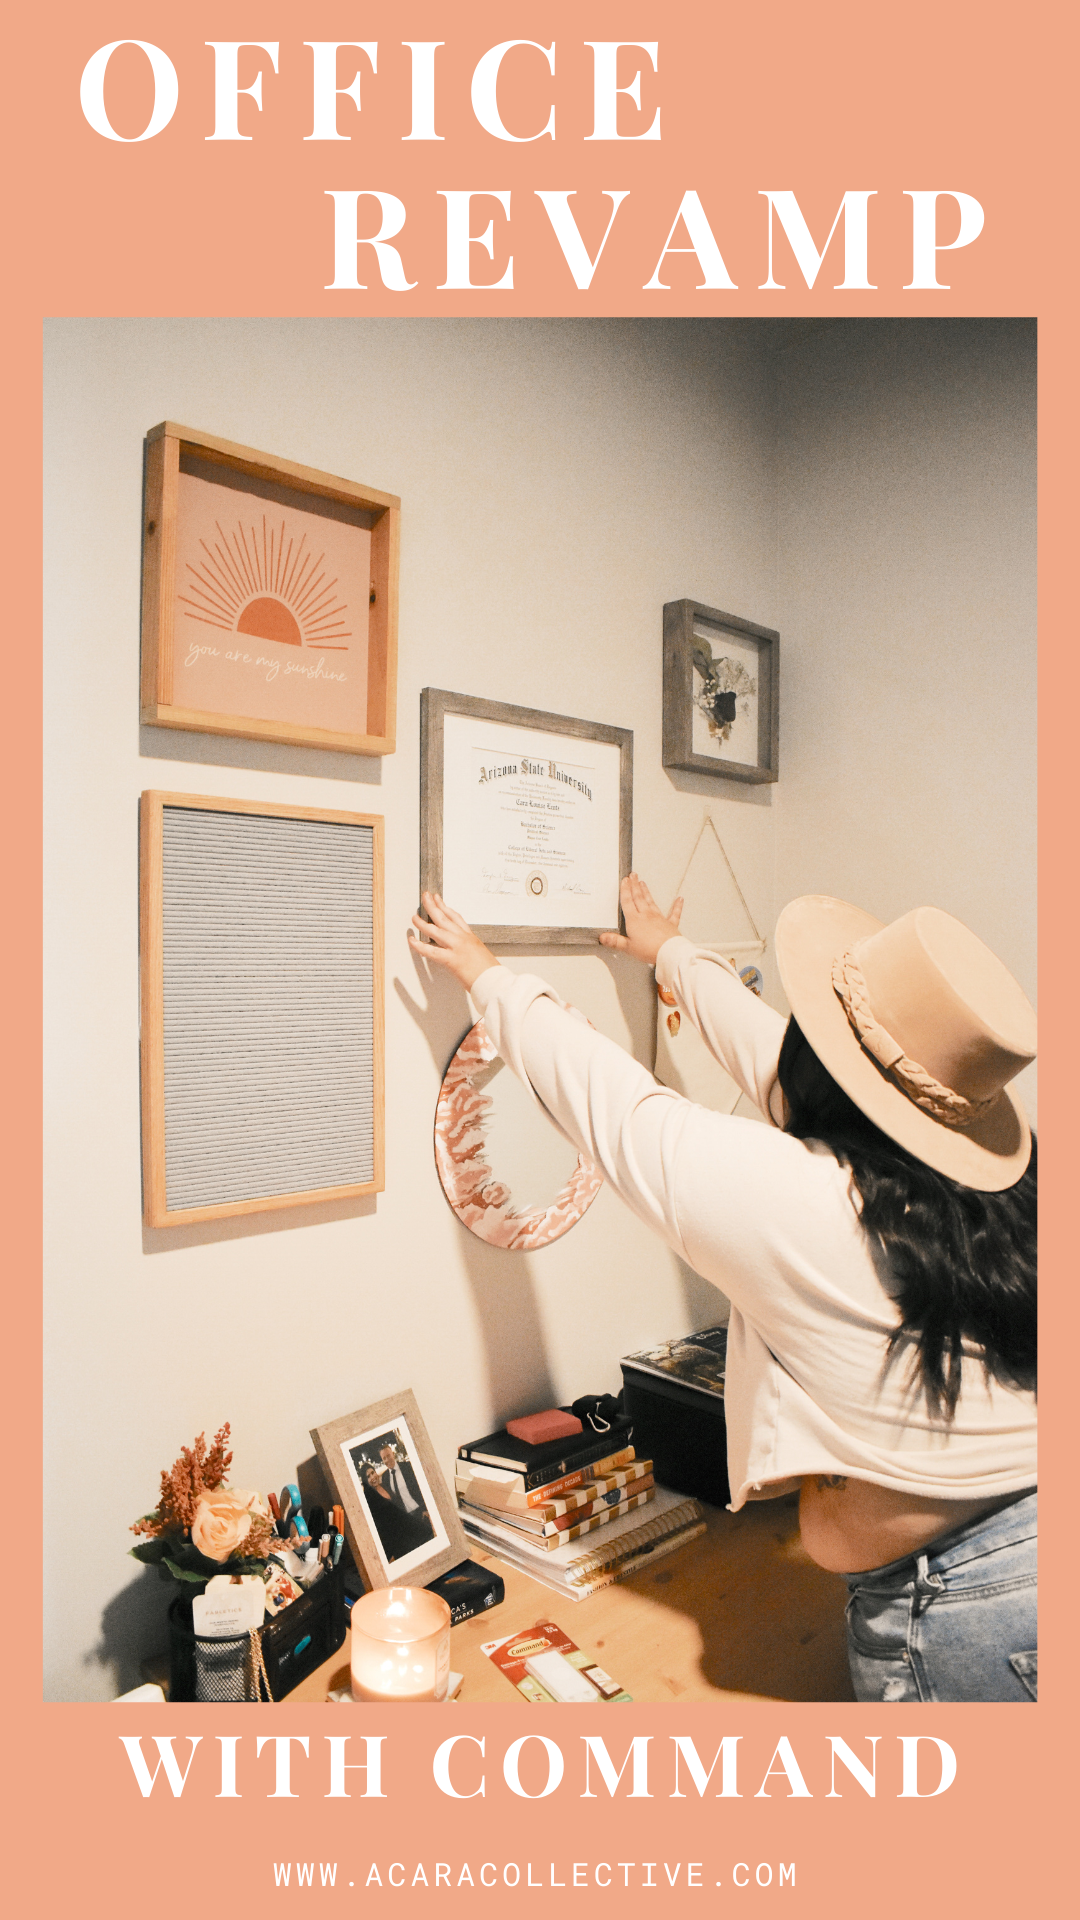
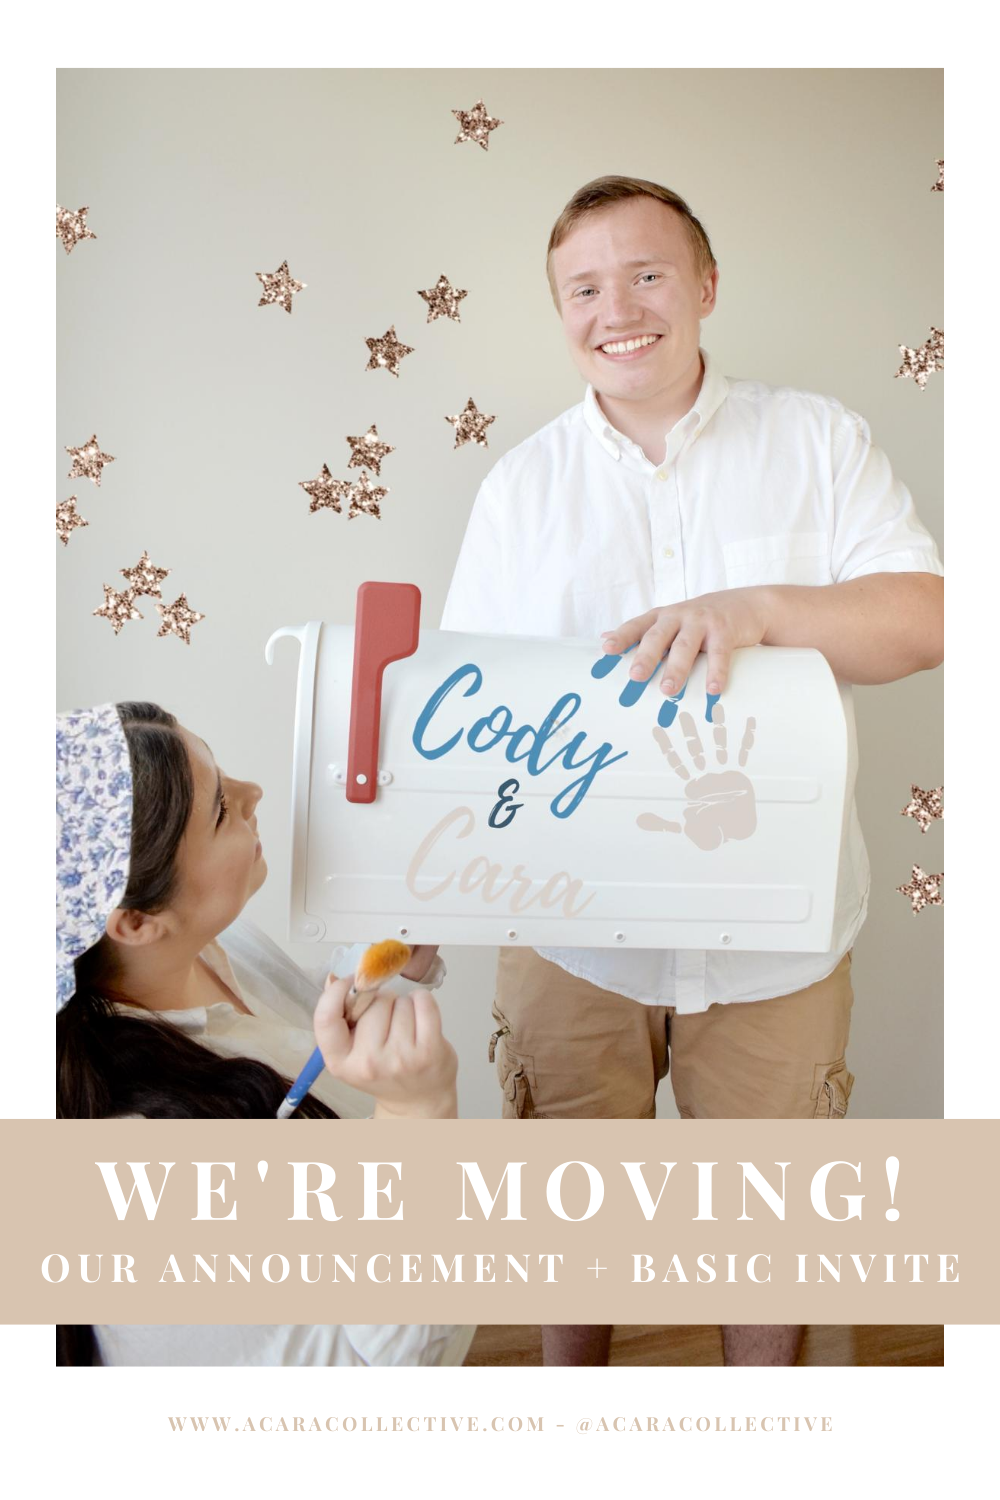
The day has finally come for us to share our big news! We’re moving… to Florida! After nearly nine months of research, planning and pro + coning our hearts out we decided to make the sunshine state our new home! We couldn’t be more excited for this next step in our life together + will be sharing all about our move, decor + design, and all things DIY over at Let’s Staj Home - our YouTube + Blog!

While we’ve been spending time decluttering + packing, we’ve also been savoring + looking for all the small ways to celebrate and share this exciting time with friends and family! Though we can’t be in person to celebrate, there’s something so special about getting exciting news in the mail + that’s where Basic Invite comes in! Despite the unassuming name, Basic Invites invitations are far from basic + it’s been a joy working with them as we craft our own moving announcements!

While we’re still figuring out our exact change of address, we’re already dreaming up our stationary! We wanted our announcements to mimic our housing palette + elements (something we talk a ton about over at Let’s Staj Home). So far these are some of our favorites:

Screen Shot 2020-08-24 at 1.36.07 PM.png Screen Shot 2020-08-24 at 1.36.51 PM.png Screen Shot 2020-08-24 at 1.36.14 PM.png

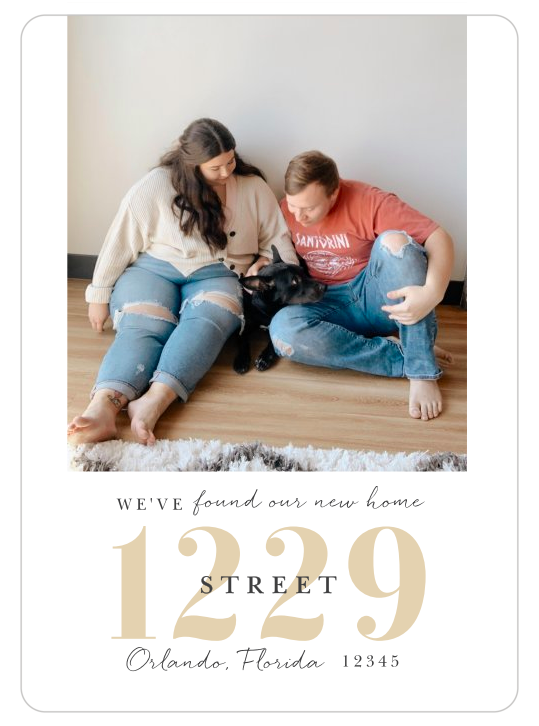
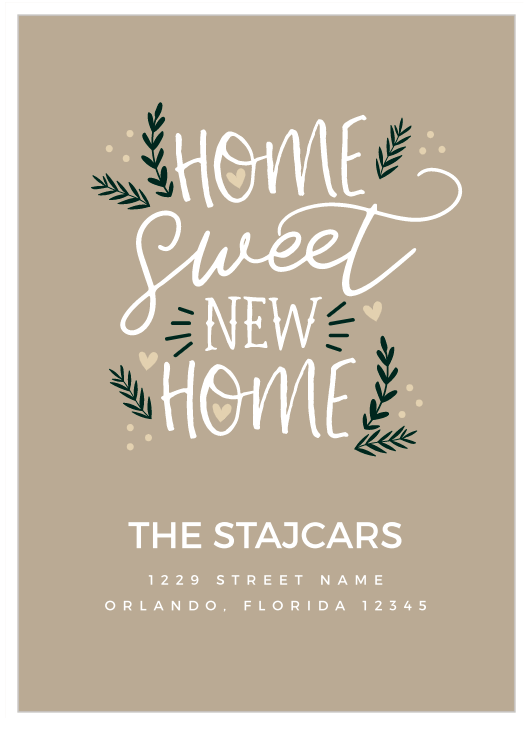
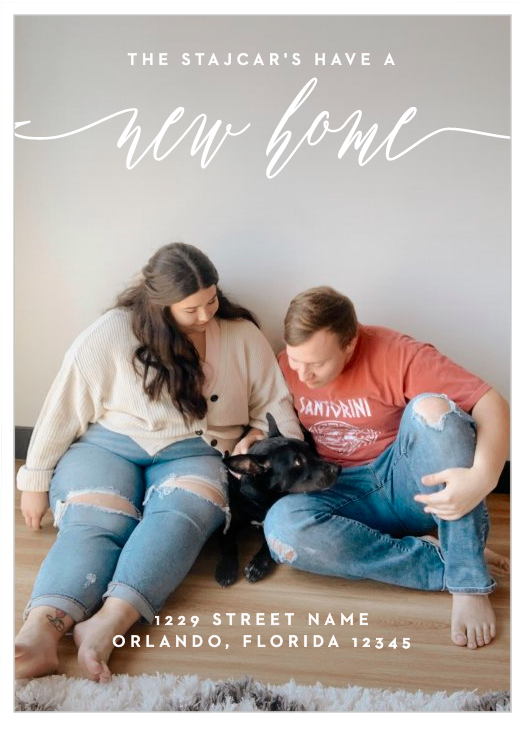
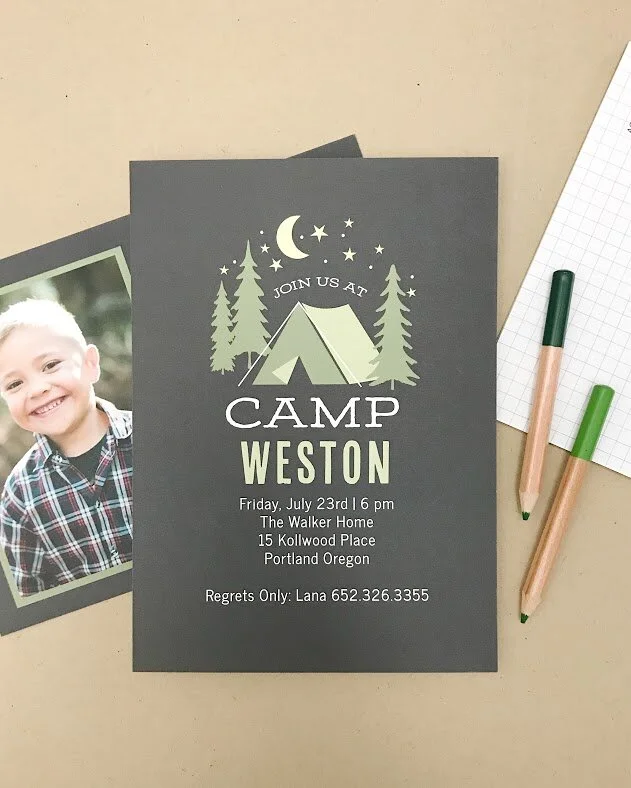
With over 180 colors to choose from, finding our palette was a breeze! Honestly there were so many versions of all of these we’ve loved in various combos of our color palette it’s so hard finalizing. One thing I love about Basic invite is your ability to order a printed sample of the invite, announcement or really any piece of customized stationary before ordering! You can ensure everything is just right + make adjustments if you want to before ordering! I definitely love this in our situation as we’re still waiting for our exact address, but, want to get an idea of how the announcements will actually look!

Basic Invites not only offers essentials for anyone moving + wanting to celebrate with change of addresses or home warming events but any other type of stationary you’d need for any event! Heading into this time of year we have LOTS of birthdays to celebrate so I’m also excited to have all their amazing birthday card options right online! We know things are different right now - birthday parties are a little more FaceTime + Zoom than real face time, but these sweet birthday invitation cards make those virtual moments that much more special. Whether you’re celebrating a little one’s exciting day or a 60 years young milestone, Basic Invite has options for you!

Birthday 2 34 04 PM.jpg

While Cody hasn’t popped the question just yet, looking into their wedding stationary has us so inspired and in love with how highly customizable each piece is. Beyond the 180 different color options I mentioned with our moving announcements, they also have over 40 different envelope color options to choose from making customization for the beginning parts of your big day truly possible! Another bonus with envelopes? They’re peal and seal so no paper cuts or icky taste when it comes time to send off invites to our many guests! As a creative + visually driven person, these (many) options make Basic Invite an exciting no-brainer of convenience, stunning design + personalization to the highest degree.

Box One.jpg
Woodgrain One.jpg

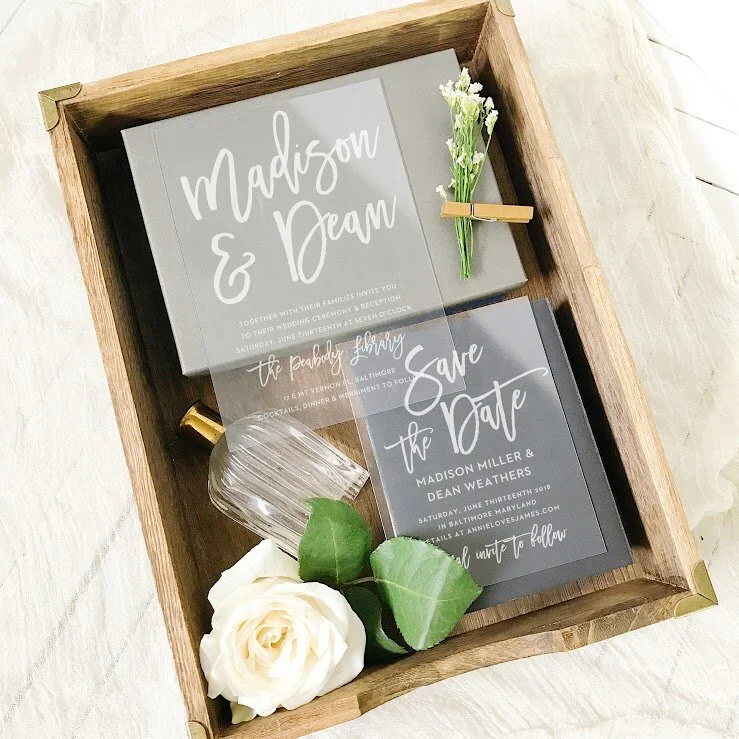
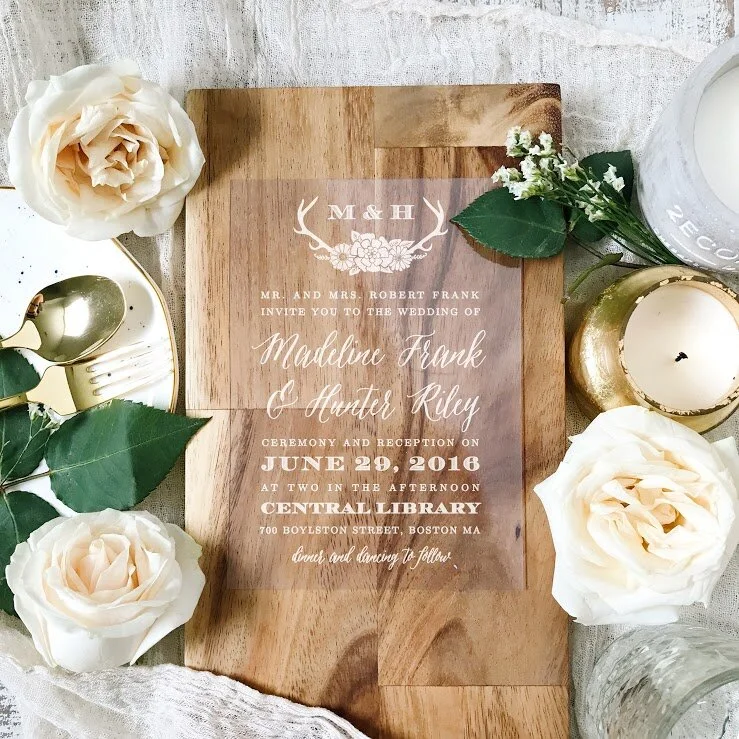
Even though we aren’t to the point of choosing details like our save the dates or invites, I can already tell you I’m leaning towards these stunning clear options! So simple + timeless with the fun and fresh impact of the clear is just so lovely! You can even keep any foil colors like gold, silver or rose gold continued to the outside of your envelopes for the perfect, classy look!

Until I can start dreaming up even more about our wedding, I'll be spending spare time between packing boxes + searching on Zillow tweaking our Announcements to be just right! If you’re interested in using Basic Invite for your next stationary needs, be sure to use code 15FF51 to get 15% off your order!

Looking to keep in touch? Be sure to check out Basic Invite across social platforms on Facebook, Twitter, Pinterest and Instagram!

THE BEST MOVING ANNOUNCEMENTS WITH BASIC INVITE
August 26, 2020 /Cara Lentz
Let's Staj Home, Basic Invite, Home, At Home, DIY, Festive, festive
DIY, Festive, Home & Decor
Comment
1.png

Harry Potter Inspired Candy & Bar Trolley

July 24, 2020 by Cara Lentz in Bounding, Harry Potter, Home & Decor, Festive, Shop IG, Shopping

Whether it’s from being safe at home for a bit too long, our plans to visit the Wizarding World being canceled or some new & budding projects calling for some Harry Potter fun, we wanted to celebrate Harry’s birthday this year with a bang! The best way to start? Making our own version of the Hogwarts Express Trolley! Fit with all the candy you could think of - Wizard inspired takes on Muggle candy - and plenty of Muggle booze (giggle water?) I’d say we did a pretty good job! Overall, creating this Trolley cart was super fun and really doable predominantly with things you already have! Below I’m sharing some behind the scenes of setting it up, tips on sourcing materials for it (and direct links to purchase some of the same items we did online) and of course links to our HP inspired cocktails!

View this post on Instagram

Anything from the trolley dears? ✨ ⁣ Putting this at-home trolley together was SO much fun! While we added the traditional treats & sweets 🍭 we also added on our favorite Harry Potter inspired cocktails! 🍻 (Blog Post on those coming tonight!) On the blog I’m sharing how we did it plus some tips on creating one of your own! ⚡️🍭✨ ⁣ What’s your favorite Wizard (or Muggle) treat? 🍭🍭🍭

A post shared by Cara | Social Media Consultant (@acaracollective) on Jul 24, 2020 at 12:11pm PDT

54B27F99-C1E7-4B5E-9935-32049ED2A599.jpeg

The Cart + Containers

For the cart we actually just repurposed our current bar cart! While we grabbed ours at a local vintage market, you can purchase a cart basically anywhere and at a ton of different price points! I’ve included a few below that I think are a great mix of price and style (and would look good all the time) candy trolley or otherwise!

As for the candy containers, we only had to purchase a few larger candy dishes to pull this off! If I could do it again, I would purchase glass apothecary jars (as linked below) because you really can use them for so many things and they’re absolutely beautiful! As for the jars we repurposed, some were old candles others were old jam jars. We’re really big on saving + repurposing anything we can these days and it certainly paid off on this project!

IMG_0574.jpeg
Adjustments.jpeg
Adjustments.jpeg

The Candy + Booze

Now of course - the important part(s)! As for the candy we mostly got Muggle candy as Wizards candy wasn’t really available at most of our local stores (and buying from the park was super expensive). Thankfully we were able to find candies we love - lemon drops (Dubledore’s favorite), Red Hots, Green Rock Candy (Acid Pops), Butterscotch Candies, Bertie Bot’s Every Flavor Beans, Gummi Worms, Licorice (Wands) and a mix of Whoppers + Bridge Mix (Dragons Eggs) to complete our cart! All of these and more are available online and can be customized to whatever you wish! Getting creative here is the fun part!

As for the booze, we actually on displayed those which we used in the HP Inspired Cocktails (we have loads more - we love trying out cocktails from around the world + different time periods) You can find the HP Inspired Cocktails here - including Butterbeer, Amortentia (Love Potion), Chocolate Frog and Pumpkin Pasty.

3.png
Adjustments.jpeg
Adjustments.jpeg

The Baked Goods

Lastly we of course have to mention the plethora of baked goods we added on! All from our local bakery - Sweet Dee’s - as part of their yearly celebration of the Boy Who Lived! We purchased a mixed box and couldn’t be happier. Don’t live in Arizona? No worries! Many if not all of these are easily made at home with your own magic! I’ve linked pins below to amazing recipes that will surely bring you those delicious & festive tastes and treats at home!

Harry Potter and Ron Weasley Christmas Sweater Cookies
12a133c88802c83ae8e1a8e42f4225e3.jpg
c7a053176d85e710fdf48146cbb16dd5.jpg
a6a3e71ce9a3d6b76f5a55d11e569afd.jpg
IMG_0559.jpeg
Harry Potter Bound Inspiration copy.png
July 24, 2020 /Cara Lentz
Harry Potter, Home, At Home, DIY, Cocktail, Festive, festive
Bounding, Harry Potter, Home & Decor, Festive, Shop IG, Shopping
Comment
2.png

Tip Tuesday : 12 Couples Poses & Photo Ideas At Home

April 28, 2020 by Cara Lentz in Creator Tips, Social Media

I know during these times at home it can feel like there isn’t anything all that special - date nights for a lot of us included getting out. But, since we’re all staying in I wanted to round up some photo ideas to do at home AND photos you can do yourself! All of the photos here were shot on our iPhones AND I’ve linked any “extras” you can order online if you want to up your photo game! I know some of the things that have been canceled - weddings, engagement parties, celebrations and so much more - are heart wrenching but we can still celebrate our love at home until we get to celebrate.

To take these photos you’ll need either a phone or camera! You certainly don’t need a tripod but having one does open up options for unique shots. I’ve linked the ones I use for my camera and phone below and definitely suggest at least getting one for your phone! If you don’t have one or don’t want to get one you can lean your phone on books, stools, tables or really anything else you can think of - just be careful! Your phone will break if you’re not careful so take risks wisely! Beyond those, you can also purchase a bluetooth clicker that allows you to take photos with a simple click! I love using this when we travel but its perfect at home too!

IMG_5643.jpeg

Dog Stack

IMG_5627.jpeg

Forehead Kisses

IMG_5039.jpeg

Half & Half :

IMG_5639.jpeg

Making Breakfast:

IMG_5611.jpeg

Dog Hugs :

Adjustments.jpeg

Holding Hands :

Adjustments.jpeg

Bed/Couch & Coffee :

IMG_5633.jpeg

Stool Shots :

IMG_5623.jpeg

Tippy Toes :

IMG_5619.jpeg

Pillow Talk:

IMG_5645.jpeg

Projector Pics:

IMG_5622.jpeg

Mirror Shots:

April 28, 2020 /Cara Lentz
Tips, Instagram Tips, DIY, At Home, Inspiration, Let's Staj Home
Creator Tips, Social Media
Comment
1.png

DIY: How to Make This Dreamy Cloud Mirror

April 27, 2020 by Cara Lentz in DIY, Home & Decor

A while back Suzy Shattuck posted about creating a dreamy cloud mirror and happening to have a mirror myself I went for it! I totally just watched the tik tok a few times and guessed the rest BUT here are some tips & steps to making it yourself!


To make the mirror you’ll need:

  • any mirror! I used this circle mirror from Michaels Crafts but you can use literally any mirror!

  • paint brushes - you’ll want to use smaller brushes for this and a wider brush but you can honestly use anything you have if you have patience and get creative!

  • paint - again, you can really use any colors you like but I really think lighter pastels look best! Acrylic paint is the one I used but you can probably use others! I went with my favorites - peachy shades & pink! I also think this would be gorgeous with whites, blues or purples!

  • mirror cleaner - you definitely don’t have to use this but I do recommend cleaning off the mirror before you paint for best outcomes!

IMG_5037.jpeg

To make the mirror…

  1. Start by cleaning the mirror off! You can use cleaner or water but make sure to get any dust or gunk off of it to ensure paint goes on and stays on!

  2. Paint the general boundaries of your mirror with a base color. On my mirror because it’s circular, I did the edges and figured out about how far in I wanted the clouds going. For my base coat I went with a darker pink and then a lighter pink to create some depth of color. Be sure to let this layer dry before moving on!

  3. Once your base layer is done, pick another color and start creating the shadows of your clouds. This is a great time to mix up random colors and get creative with the base of your clouds! There is no perfect way to do this so just try your best and keep going back until you’re happy! It can look a bit funny at this point but I promise it’ll look good! Once this is almost dry you can mix your colors with white to lighten them up slightly. Use these to define your clouds a little more then let the layer dry completely!

  4. This (almost last) layer will be extremely light colors and whites to define the clouds! Be sure to create some purely white ones and add the white on top to create depth! Again, make sure it dries completely!

  5. This is totally optional BUT if you want a more whimsical mirror, go in and add little dots and sparkles throughout with white and a very tiny brush!

    Keep going back and touching up as you want, then let dry & hang when you’re ready! It’s the perfect little touch in an office, closet, vanity or really anywhere!

April 27, 2020 /Cara Lentz
DIY, Home, Let's Staj Home, At Home
DIY, Home & Decor
Comment
Paw Print Project.png

DIY Paw Impression Ornament

April 21, 2020 by Cara Lentz in DIY, Home & Decor

We have been wanting to do something special with Knox and after coming across this impression kit we decided a paw print ornament was the way to go! Though these are intended for babies, they work perfectly fine on pets (and are safe!) We recommend using any extra for something else memorable like your home key (your first home or apartment ornament)!

April 21, 2020 /Cara Lentz
DIY, shop IG, Shopping, At Home, Home
DIY, Home & Decor
Comment
IMG_4951.jpeg

Hat Wall Display Essentials & My Fave Hats

April 21, 2020 by Cara Lentz in DIY, Hair, Home & Decor, Organization, Shopping, Shop IG, Style

I adore how easy and effortless it is to display your hats - who doesn’t love accessories doubling as decor? Here are all the tools you need (minus a stool) to display your hats, plus some inspiration from Pinterest & links to my favorite Lack of Color Dupes now on sale (4/21) for only $34!

IMG_4952.png
April 21, 2020 /Cara Lentz
shop IG, Shopping, DIY, Hair Accessories, Hats, At, Home, Let's Staj Home
DIY, Hair, Home & Decor, Organization, Shopping, Shop IG, Style
Comment
3.png

My At-Home Office Revamp with Command

April 13, 2020 by Cara Lentz in Home & Decor, Shopping, Shop IG

This extra time at home finally gave me the chance to take on decorating out at-home office! I’ve been so excited to do it since we moved in but just hadn’t gotten around to doing it. Through InfluenceHer Collective’s Spring Essential’s Kit partnering with Command, I’ve been able to get all the things hung and decorated exactly how I’ve always wanted! Today, I’m sharing some of the projects we took on and with which Command products we used!

Adjustments.jpeg

Calendar & Music Corner

When we started out working on this little nook, we knew we would put the record player on our vintage chest but beyond that were pretty clueless. I knew I wanted to have a functional but ever changing calendar and between some Pinterest searching and seeing what we had in the apartment I put together this makeshift calendar. It’s our leftover butcher paper, some strong pom pom string and large letter stickers! Be sure to use the large hooks for this since the paper can be quite heavy depending on the roll!

Adjustments.jpeg

Minnie Ears Display

Since I’ve taught myself how to make Minnie Ears, I really wanted a way to display them! I’ve seen a few different ways around Pinterest and thought lining them up like this was my favorite for the time being! For this, we used Command Small Sized Wire Hooks.

Adjustments.jpeg

Above Desk Gallery Wall

This was by far my favorite project in the office! I have had my diploma since December of 2018 and haven’t hung it up until literally a few days ago when we did these projects! It feels so good to finally have the most expensive piece of paper I own up on the wall! Before we placed everything on the wall, I took a photo of above my desk and made stickers on PicsArt of each item rearranging them until I found the way I liked them best! Once we figured that out, we used the Command Frame Strips - two at least - on the back of each item and started hanging! I still have to figure out what I want on the letter board and any other pieces to add but for now I am so happy with how the above desk area turned out!


Now that the office is (almost) done, we’ll be moving on to our living room and bedroom with more Command projects! Be sure to save these pins to come back when you do your own Command projects around your space! Happy decorating!

1.png
April 13, 2020 /Cara Lentz
DIY, Let's Staj Home, Home, Decor, Office, At Home, Tips
Home & Decor, Shopping, Shop IG
Comment
EAR TEMPLATE.png

Minnie Ear Template

April 07, 2020 by Cara Lentz in Disney, DIY

Be sure to print this on your standard size of paper (8.5 x 11) for ears

Measurements for covering headband are 16 x 2 inches

Measurements for bow are 5 x 10 inches

April 07, 2020 /Cara Lentz
Disney, Ears, DIY
Disney, DIY
Comment
Copy of Copy of April Pins.png

How to Make Minnie Ears for Disney

April 06, 2020 by Cara Lentz in Disney, DIY, Festive

In this time at home after our most recent trip to Disneyland I decided I want to teach myself how to make these cute ears! Since then, I’ve tried about four or five different methods and found one I personally like. Plus, I feel like the method I show you is the easiest to replicate regardless of how advanced your crafting skills are which is always my goal with DIY! For this tutorial, I’ll be sharing the newest ears I’m making: Hades!

View this post on Instagram

Sharing a step by step guide on how to create your very own Minnie Mouse Ears! This has been my absolute favorite craft while we’ve been home & hope you enjoy! All instructions and links to suggested supplies can be found at www.acaracollective.com/acc-blog/how-to-make-minnie-ears-for-disney Feel free to leave any questions below!

A post shared by Cara Lentz ✨ (@acaracollective) on Apr 8, 2020 at 12:26pm PDT

Above I’ve shared the IGTV video I created to visualize this process. Below I am sharing step by step with links to tools and materials to purchase if you decide to try this out!

2.png

ONE

Gather all your materials for making the ears! This includes:

  • Fabric: Sequin, Knit, or really any kind you can imagine! If you’re just starting out I recommend a knit to make it a bit easier! Additionally, one yard will totally be enough- for me, one yard typically can make at least four pairs of ears!

  • Headband: I have purchased these and am currently loving these! If you plan on making ears with more surface area, I recommend trying a wider headband!

  • Needle & Thread/ Sewing Machine: I personally sew mine by hand because I have the time now and am not mass producing (yet!) BUT if you have a sewing machine it would make things go much faster!

  • Hot Glue Gun & Glue: I personally use the Michaels crafts glue gun and also recommend this one! Be sure to have lots of glue gun sticks on hand (I’ve run out mid project and it was a mess!)

  • Foam Board of Up-Cycled Box Cardboard: I have bought this foam board and find it is a tad too thick for my desired look. However, I’ve been up-cycling my various cardboard boxes from the mail (like a USPS box) and have found those work perfectly!

  • Batting: I use this kind or this kind but truly any batting will work. I don’t recommend getting straight up foam but if you do, get a firm one and skip the cardboard insert.

  • Fabric Fuze or Stiffening Spray: You might not necessarily need these but if you want a more firm ear or want a cleaner glue on the front, be sure to use these!

  • Templates: You can either trace ears you have for a rough idea OR you can find my template here including dimensions of what I cut!

  • Scissors: Be sure to use fabric scissors when possible on fabric (and fabric only!) but if not, opt for the sharpest scissors you have.

  • Extras: From felt to glitter paint or charms for the middle of your bow, you can customize any plain pair of ears to be something a little extra special! Sky’s the limit so get creative!

TWO

Taking your templates, trace out your patterns on the fabric and cut! A great tip for the ears fabric is to place them on a piece of fabric that is double the needed length and fold it in half (shown in video) to be able to cut both pieces at once! Be sure to also take the smaller template to trace on the cardboard and cut that out as well setting aside. Using the same smaller template, cut out four batting inserts - two per each side (a front and back)

THREE

Once all your fabric pieces are cut out, sew them together. Be sure to leave the bottom of the ears open so you can insert cardboard and batting. For the bow, be sure to leave a bit at the edge available to flip inside out before finishing the seam.

FOUR

For the ears, place the cardboard insert inside then place each piece of batting (two per ear) on each side of the ear. Once filled, be sure to sew up the bottom. Repeat for other ear and set aside when completed.

FIVE

For the bow, seal the final seam of the rectangle piece. Taking the thin and short piece (1.5x4 in) take hot glue and place near each side folding the fabric in to create a clean edge on both sides. Accordion fold the rectangle bow piece as desired and tie or sew the middle point to keep the bow together. Once tied, place a dollop of glue on the decided back of the bow and place the thin piece, continuously wrapping around until you reach the back again. Cut off any excess fabric and set aside for another pair.

SIX

If you plan on adding extras to your ears, like I’ve done for these Hades ears, be sure to do that before gluing to the headband. Once done, place on headband without glueing to ensure they are evenly apart and, if using a sating headband, mark on the top the middle of the ear so finding its place is much easier when gluing.

SEVEN

Take your hot glue gun and apply to the bottom of the ear (where it attaches to the headband) towards the back (as shown in video) and place. Be sure to hold. Repeat on other side and once firm, flip to show the back of ears. Apply another layer of glue as shown to secure the ears to the headband and let firm.

EIGHT

Once ears are glued, glue the bow into the middle of the headband. Once initial glue is dried, flip to back and secure as you did with each ear.

NINE

Flip ears back to the front and place a small amount of hot glue on each ear where the bow touches to keep the bow up and not drooping.

TEN

If you want your ears to be more stiff, place in shallow box and spray with Stiffening Spray. If not, make any necessary touch ups, let rest and you are done!

I hope you found this tutorial and instructions helpful! If you’re looking for some inspiration for ears, I’ve created a Pinterest board here for you to check out!

1.png
April 06, 2020 /Cara Lentz
Disney, DIY, Ears
Disney, DIY, Festive
Comment
6.png

Valentines Sweet Charcuterie Board

February 10, 2020 by Cara Lentz in Festive, Food & Drinks

One of my favorite things in the whole wide world is charcuterie boards! No matter the theme for making them they’re the perfect way to up your snack game, customize to the occasion and any dietary needs! For valentines day I put together something extra fun (and extra pink) I hope you’ll love!


IMG_0594.jpeg

To build this board, I started in the candy aisle (duh!) Valentines has so many fun, colorful options in heart shapes and is in so many ways the second Halloween (or first?) I’ve linked everything I snagged below including Valentine’s M&M’s, Hershey’s, Conversation Hearts, and JuJu Hearts!

IMG_0593.jpeg

My favorite little sweet treat I made are these pink, heart shaped mini rice treats! To make these I mixed up rice treats per usual - rice cereal, marshmallows and lots of butter - and added red food dye to the mixture. I recommend doing this with the butter so it goes in more evenly and you don’t get any streaks or paler pieces! Once mixed, press it into a baking dish or cookie sheet with raised edges and chill until set. Once set, take a small (or whatever size you’d like) cookie cutter and cut them into your hearts!

610239AD-101B-4444-A40B-317FB709FACA.jpeg

I added drizzled chocolate and sprinkles - or even dipped chocolate with sprinkles for added Valentines flare! Get creative with these & its even more fun!

209B2833-BF5A-47AE-B654-41BF7680D62E.jpeg

For the other rice treats, I made them the same way but instead of dying them left them plane & cut into larger squares. If you don’t feel like making these but still want the added Valentines fun of chocolate and sprinkles or candy, head to the store or order pre-made Rice Krispie Treats online. All you have to do from there is unwrap, dip in chocolate and decorate to your liking!

1A9E5D3B-92A4-4A2C-B945-951600F1A46B.jpeg

To make the pretzel rods & mini chocolate dipped & drizzled pretzels all you need to do is take a piece of wax paper and place on whatever cookie sheet or large tray/plate you’d like! Place the pretzels out evenly and make sure they’re not connected or else the chocolate will keep them together! Once placed, melt your chocolate - I used milk and white - and drizzle over or dip them in, using a spoon to add on additional where empty spots may have been. Once done, you can use candies or sprinkles to decorate to your liking! I personally recommend using smaller sprinkles - the large hearts were super cute but could be a little to much to chew on when we tried them out!

IMG_0592.jpeg
IMG_0585.jpeg

Ingredients:

Tips for Creating Your Board:

IMG_0581.jpeg

Charcuterie boards can be so intimidating! I remember looking at the ones on Pinterest and thinking I could NEVER make one that beautiful but honestly, it’s something anyone can do! Here are my tips for making it happen!

  1. Start by laying out your biggest bits! For this board, the rice treats, pretzels rods and strawberries were the biggest pieces! I laid them on one at a time in a way I thought looked nice! I check the look of things by looking at the board from the top and various sides!

  2. Figure out your fillers! Fillers typically are smaller pieces - mini pretzels, M&M’s, JuJu Hearts, etc. Once you’ve got these figured out you can slowly begin to place these in to fill in the gaps! I suggest placing them around the board so any side can access that bite without having to reach across the entire board!

  3. Adjust as needed! Even though things can start looking good, they can also move or mess up! Don’t fret- just squeeze things around and see what you like!

7.png
February 10, 2020 /Cara Lentz
Food, Entertaining, Valentine, Galentines, Festive, festive, DIY
Festive, Food & Drinks
Comment
 

ABOUT | APPROACH | CONNECT | CONTACT | INQUIRIES

© 2026 A Cara Collective | All Rights Reserved